Open Daily (Including PH) 10am - 7pm
33 Ubi Ave 3, #01-30 Vertex, S408868
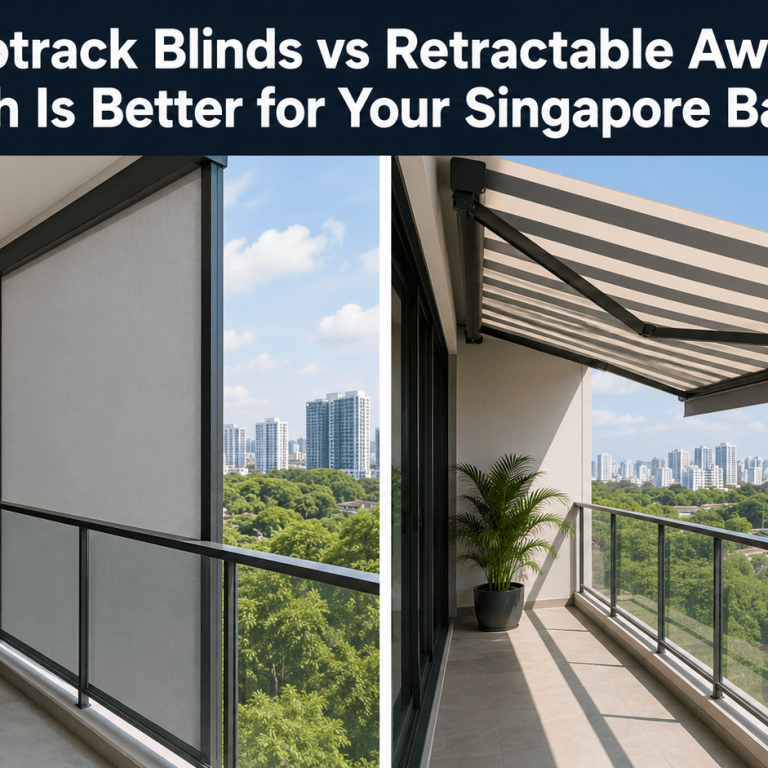
Ziptrack Blinds for BTO Balconies: A New Homeowner’s Setup Guide
🔑 New Homeowner · BTO Guide
Ziptrack Blinds for BTO Balconies: A New Homeowner’s Setup Guide
Just collected your keys? Here’s exactly where Ziptrack fits into your renovation timeline — and how to plan it right the first time.
Congratulations on collecting your BTO keys! Amid the excitement of choosing tiles, planning carpentry, and picking paint colours, your balcony is easy to overlook — until you move in and realise it’s unusable for half the day because of heat, glare, or sudden rain.
The good news: Ziptrack blinds for your BTO balcony are one of the simplest, highest-impact additions you can plan for — and getting the timing right means it integrates smoothly into your renovation instead of becoming an afterthought.
This guide walks you through exactly when to plan your ziptrack BTO balcony installation, what decisions to make early, and how it fits alongside your other renovation milestones.
Why It Matters
Don’t Let Your Balcony Be an Afterthought
Most new BTO owners spend weeks deciding on kitchen layouts and carpentry finishes — and then leave the balcony for “later.” The problem is that an exposed, unprotected balcony in Singapore quickly becomes a wasted room: too hot in the afternoon, too wet when it rains, and often used only for laundry.
Planning your Ziptrack installation alongside your main renovation — rather than as a separate project months later — means cleaner cabling for motorised systems, coordinated colour schemes, and one less thing to arrange after you’ve already moved in.
Timeline
Where Ziptrack Fits Into Your BTO Renovation Timeline
A typical BTO renovation takes 8 to 12 weeks from start to handover. Here’s where your balcony Ziptrack decision should sit within that window.
1
Before Key Collection
Get a Ziptrack Consultation Booked Early
Book a free site visit as soon as you know your unit layout (even before keys, if your floor plan is available). This lets you plan budget and design alongside your ID, instead of bolting it on later.
2
Week 1–2 (Right After Key Collection)
Confirm Measurements On-Site
Once you have keys, our team measures the actual balcony — not just the floor plan — to confirm the exact dimensions, railing type, and ceiling height for your Ziptrack system.
3
Week 2–4 (During Main Renovation)
Coordinate Electrical Points with Your ID
If you’re going motorised, this is the critical window. Electrical points for the motor must be planned before tiling and false ceiling work are completed — adding wiring afterward costs significantly more.
4
Week 6–8 (Near Completion)
Final Fabric and Colour Selection
By now your overall colour scheme and finishes are confirmed. Finalise your fabric openness factor and frame colour to match the rest of your home.
5
Final Week (Before Move-In)
Installation Day
Ziptrack installation typically takes half a day to a full day depending on system size. Scheduling this in your final renovation week means you move in with a fully usable balcony from day one.
SmartZip® Tip: The single most common mistake new BTO owners make is treating the balcony as a “later” project. By the time you’re standing in your flat with keys in hand, your Ziptrack plan should already be underway — just like the rest of your renovation.
Decision Guide
5 Decisions to Make Before Your BTO Ziptrack Installation
⚡
Manual or Motorised?
Motorised systems offer remote and app control but require an electrical point — plan this during the wiring stage of your renovation, not after. Manual systems are more budget-friendly and need no wiring at all, making them ideal if you’d rather decide later.
☀️
What’s Your Balcony’s Sun Orientation?
Check your unit’s facing on your floor plan. West-facing balconies need denser fabric (1% openness) to manage the afternoon heat; east, north or south-facing balconies can use a more open weave that preserves your view.
🐾
Do You Have Pets?
If you have a cat, your balcony also needs to be secure against falls. Ziptrack can be paired with invisible grilles or pet mesh on the railing for full protection — decide early so both systems are measured and installed together.
🎨
What’s Your Overall Colour Scheme?
Ziptrack frames and fabric come in a range of finishes. Coordinate this with your tile and door colours during the design phase so the balcony feels like a natural extension of your home, not an afterthought.
🏢
Any Town Council or HDB Considerations?
Exterior changes such as balcony blinds typically need to follow estate guidelines on colour and design. Our team is familiar with HDB requirements across Singapore and will flag anything relevant during your consultation.
What You Get
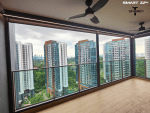
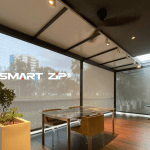
A Balcony You’ll Actually Use From Day One
With Ziptrack planned into your BTO renovation from the start, here’s what changes the moment you move in:
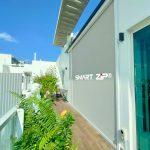
- ✓A balcony that’s usable for breakfast, plants, or relaxing — not just laundry
- ✓No scrambling to bring in laundry or furniture during a sudden downpour
- ✓A coordinated, finished look instead of a mismatched add-on installed months later
- ✓One less item on your post-move-in to-do list
Just Collected Your BTO Keys?
Book your free Ziptrack consultation now and have your balcony plan ready before your renovation even begins. No deposit, no obligation.
📍East Showroom: 33 Ubi Ave 3, #01-30 Vertex, Singapore 408868
📍North Showroom: 21 Woodlands Close, #01-25, Prizm Bizhub, Singapore 737854
🕐10am – 7pm Daily (including Public Holidays)
SmartZip® is Singapore’s leading manufacturer of premium outdoor and indoor shading solutions — including Motorised Ziptrack Blinds, BioClimatic Aluminum Pergolas, Retractable Roofing Systems, and Smart Home Integration. BCA-certified, factory-direct, and serving Singapore homeowners for over 10 years.
If you are comparing balcony solutions beyond BTO layouts, see our Condo Balcony Blinds Singapore installation guide for MCST approval, wind exposure, wide openings and power-planning considerations.